
Ever since I started playing Warhammer Fantasy Battles years ago I’ve been wanting to build my own terrain. Warhammer is a war game using miniatures, played on a (sometimes large) table. Terrain can include hills, forests, rivers, buildings, and so on. I built a series of hills and trees some time ago, but I’ve always wanted to build something really cool, like a castle. At some point I thought up the idea of a chapel, considered to be a holy site by a brotherhood of knights. Since their deity is a goddess of nature, I wanted something that looked like a blend of man-made and nature. I hoped to be able to build something that would look like the chapel is growing out of, or a part of, the ground itself.
The concept I hit upon is a stone chapel that is partly covered by a hill, almost like a hobbit hole or a dugout building. But it’s taken me several years to finally give it a try. During my Christmas vacation I invested in some materials and set to work. As I’ve been reasonably pleased with the results, I thought I’d post some pictures up here. Of course I didn’t think of pictures until I had already done a significant amount of work, but there many times that much work ahead, so that’s probably not a problem.
The first phase was to build the hill part of the building. Now, you should understand that any hill in Warhammer is stepped, so that players can place 20 mm to 25 mm models on the hillside and not have them tip over or slide down. So there is a limit to how realistic-looking one can get. And in this case I did want it to be possible for miniatures to use the hill.
So I began by my 1″ thick foam-core insulation (basically denser styrofoam) and cutting three sections of concentric hills for each side. Beveled, shaped, and stacked, they look something like this:
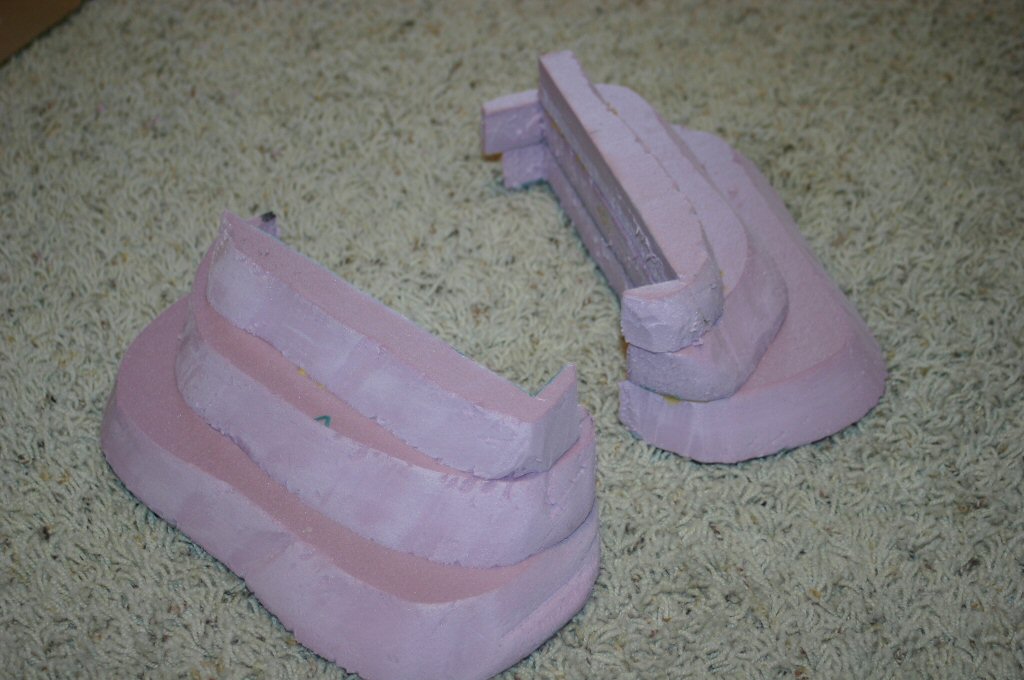
The squared out portions is where the chapel itself will go. The hill pretty much forms the two long walls of the chapel, and is supposed to be starting to engulf the front and back as well.
The next step was to build the “roof” part of the chapel. This is important because I want it to appear both as a roof and a continuation of the hill. I built this by cutting three pieces, each again smaller than the previous one, gluing them together, and rough-cutting the shape with a bread-knife. Some people have fancy heated-wire knives for this sort of thing. I wish I did, but until I do enough of these projects to justify the cost, it’s not happening. Anyway, I ended up with a shape something like this:
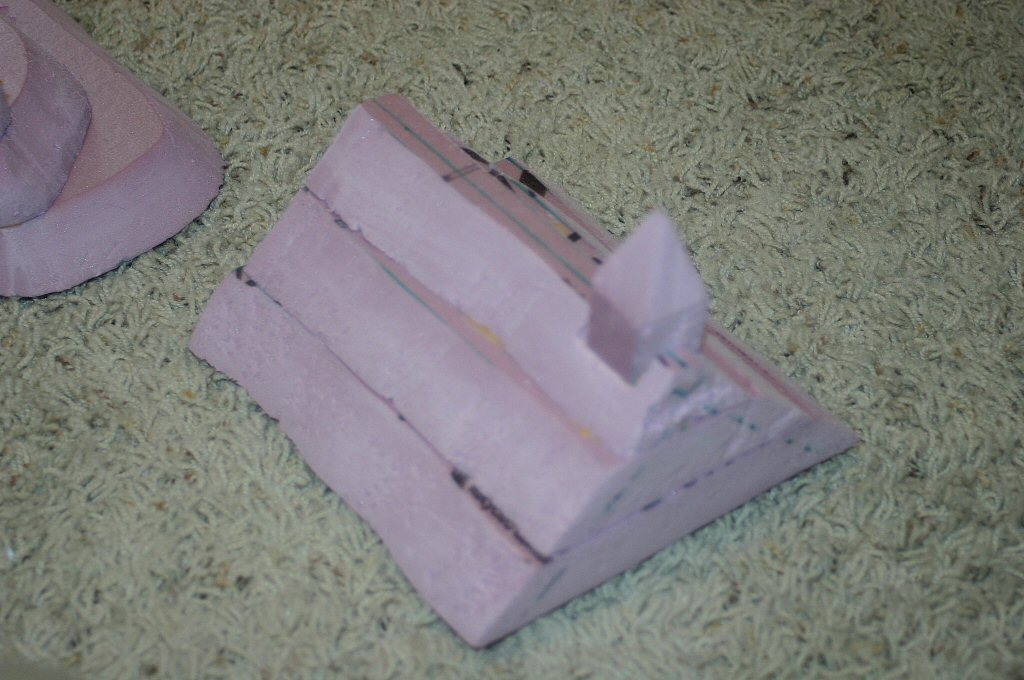
You can see I also added a small steeple. This portion of the building is not intended for miniatures to be able to stand on, except perhaps the very apex of the roof. I ended up measuring badly and making the length a little too short, but it turned out to be something of a benefit later.
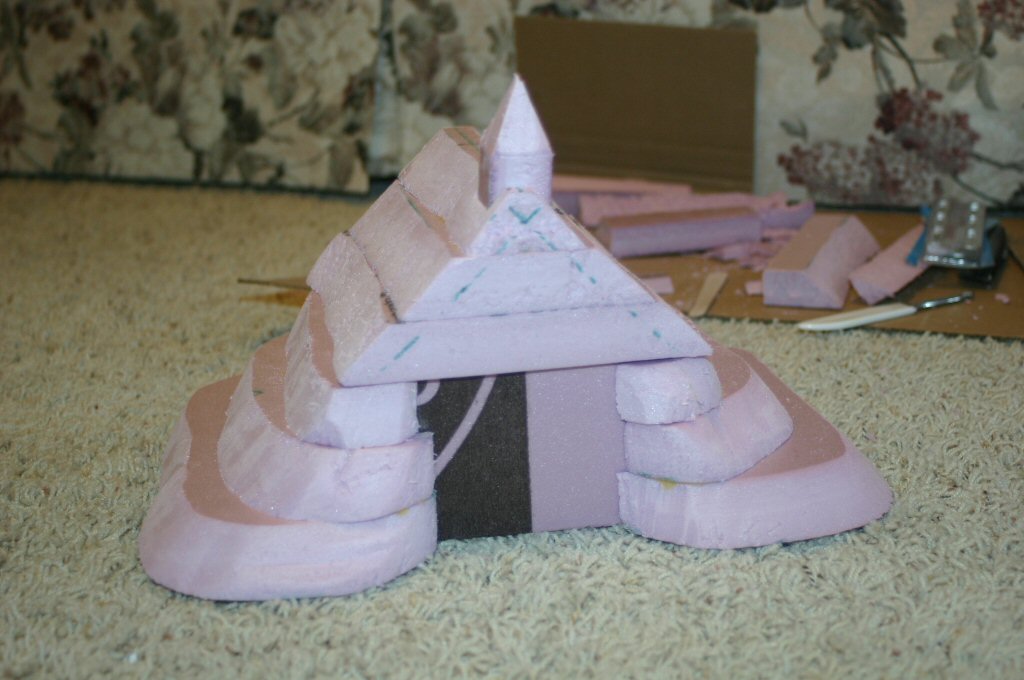
I then cut two cross-pieces for the front and back walls of the chapel, and now I had a complete, if rough, structure:
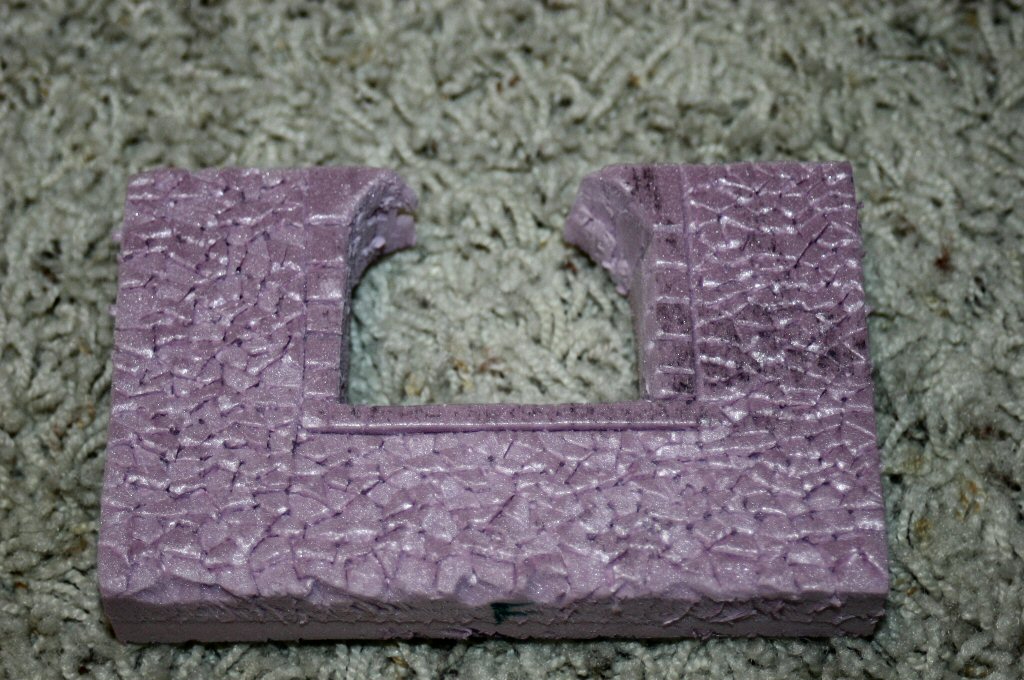
At this point I decided I needed to make the front and back walls look like a stone chapel. As you can see, they don’t look anything like it yet. My solution was to mark out where the door and windows would go, then start carving the stone texture with my Exacto-knife. After reviewing some pictures of old, stone chapels online, I decided to give it a shot.
I would cut around the outline of each individual stone, then use the head of a yarn-needle to push into each crack and further separate each stone. Then I would bevel the face of every other “stone” to give it more of a 3-D effect. In the picture below you can see I’ve already done my beveling on the left 3/4ths of the wall piece, but the section to the upper right has yet to be shaped.
Here’s what the chapel looks like when you add the walls back in after shaping:
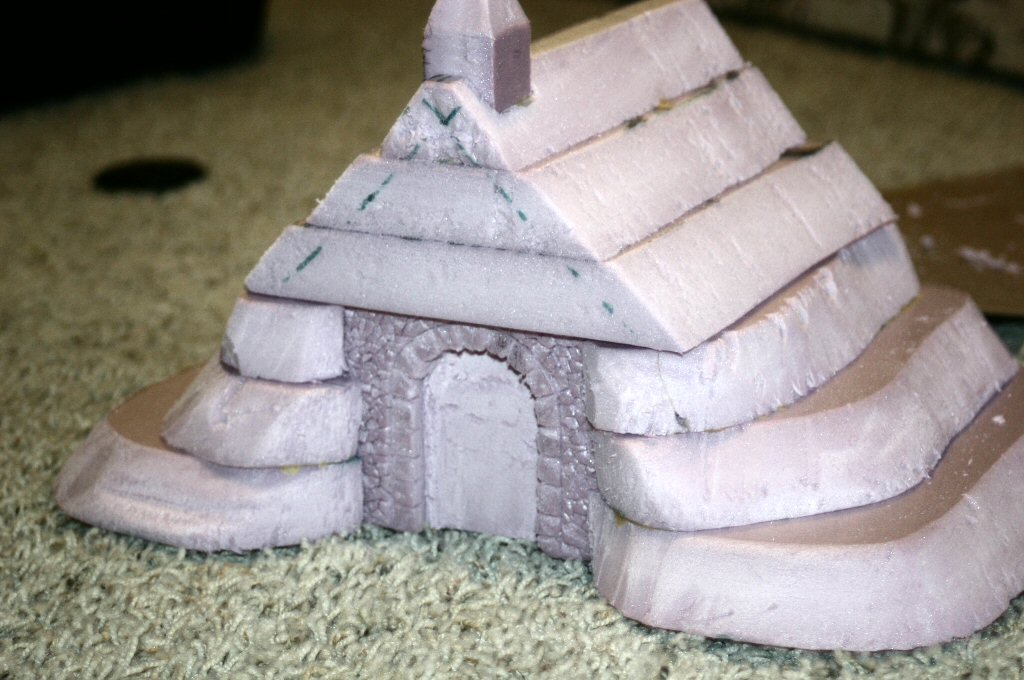
It’s starting to get there, but it still needs work. The rough shape needs to be refined to help it all flow together better. Using a variety of tools, including a wood rasp, a kitchen knife, some sandpaper, and an emery board for tight spaces, I smoothed and shaped. Foam-core behaves much like balsa wood in this regard, complete with “sawdust”, though if you use too rough a rasp it shreds more than buffs.
By this point I mounted the entire structure on an even larger base of foam-core so that I could fix it in place while I worked on adding detail. I smoothed the edges and eliminated as many hard edges as possible. It’s starting to look fairly good at this point, if I say so myself:
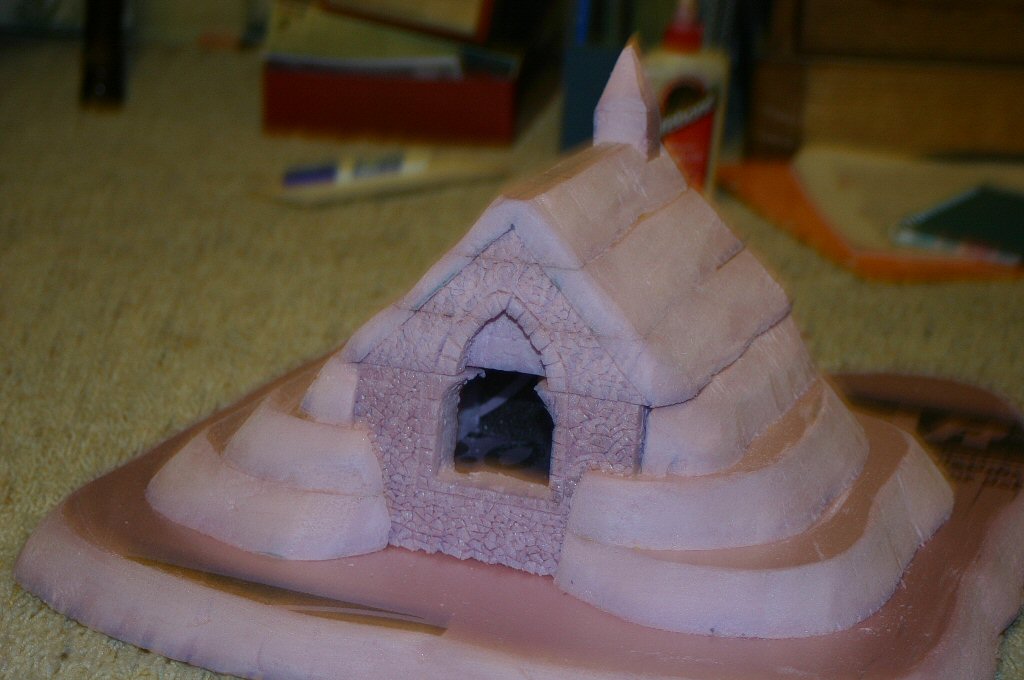
This is the back window, which will eventually sport a stained-glass work of art depicting The Lady of the Lake if I can make it work. The next step now, though, is to take some diluted Elmers glue and paint over the entire structure with it. This seals the foam-core, which I understand does not deal well with the chemicals in most spray paints. You protect the foam-core by covering it over in a thin layer that keeps the chemicals off it. Once that’s done I’ll begin painting and flocking. The hills and roof (except the steeple) will be green (paint with an overcoat of flock), and the stonework will be variations around a specific gray or brown stone-like color. I also need to find a way to carve up a door to add to the front and the window for the back.
By then I’ll be ready to detail or touch up any bad spots, and add some more landscaping, like trees or rocks. I’ll be posting more pictures as I go along, and hopefully I’ll have a finished product to show within the next month or two. I’m not on vacation now, so work will slow significantly. It’s been a lot of fun so far, and I’m looking toward to finishing up and putting it all together. I’m pleased it’s turned out so well so far, and look forward to adding to the finished product.
More pictures to come.
Are any of your minis going to fit on those terraces, or is that chapel bigger than I think it is?
The lower two terraces will fit (barely, in some cases) at least skirmishers. Ranked figures might not work so well, obviously. It didn’t occur to me to add any minis for scale, but the base board I mounted it all on is close to 18″ square. The front door is large enough that a regular foot solder comes up about 2/3 the opening.
I do need more practice ensuring my terraces are wide enough. I had to adjust this one a bit to leave enough room, which resulted in the entire hill being steeper than intended. I seem to forget that each level has to have room for a mini and trimming off the slope.
I find myself remembering an old 70 song, “Aaaaahhhh, Geek out! Le chic, tre geek! etc.”